Hi everyone,
Due to some frustrations with posting on here, I have moved my blog to WordPress. This means I should be able to post more often.
Please go to the new site (below) and sign up for the emails or follow my new blog. You will only get emails when I add a new post.
All of this content has been moved over but this site will remain for reference.
I have 5 new posts already lined up for this week including a couple of free tutorials, so go on, get over there...Don't miss out!
apipandapeach.com - Spread it!
Thanks,
Nicola
Thursday 18 April 2013
Monday 3 September 2012
They've been framed! At long last...
Anyone that has been in my home knows I have a weird number of frames hanging on walls with stock shots of strangers or blank paper in them...I find a frame, I know exactly where it will go, so I hang it and I think, I must put a photo in that. And then I don't do it for a year!
Anyway, over the last few days I've managed to correct the situation. I've thrown out the strangers and put in MY people!
My best framing victory has got to be this Ikea frame 1m tall by 70cm wide. I had loads of Instagram pictures from this summer printed 5x5 and found it very hard to choose which ones to include but pleased with the result.

My bathroom frames are also filled!

And after a mere 6 years of marriage...I've finally put some wedding pictures up! and of course, my two gorgeous boys taken by my talented photographer Cousin, Alex Watts in her studio: Willow and Pea Portraits.

Right, next project awaits, no rest for the crafty...
Sunday 2 September 2012
Rocking again this summer...

Nope, I didn't manage a single festival this year but I did find some pretty cool rocks and stones this summer. That's Zac and I at Burgh Island picking out some lovely flat slatey stones...
.JPG)
I have also found some fantastic pens which have opened up another world of rock related crafts to me! I could barely contain my excitement about these pens and having been telling everyone I meet about them...
.JPG)
There was a choice of pens and I went for these bullet tip, fine line, permanent pens.
They are great for the kids as mine are a bit too young for effective stone
painting...although they are permanent so watch out for that! If you want them shiny use Mod Podge or watered down PVA to protect your art!
Other ideas for these brilliant pens...
- You could add some googly eyes and make them into pets.
- We made some noughts and crosses stones which can be left in the garden - you can make the grid out of sticks.
- Apparently they also write well on wellies, so personalising some cheap supermarket wellies could be good fun.
- I also tried these pens on glass and they worked really well although would eventually come off something that was being used a lot and washed up. Excellent for making jars into tea light holders though. We'll be getting some spooky colours out and making some for Halloween no doubt about it.
- Mary's idea was to find enough flatish stones and write people names to use as place markers at the table.
- I just love the thought of bringing a few stones home from your holidays and writing where and when they were from on the back or the front.
Have you got any good ideas for these pens?
Nix :)
Wednesday 29 August 2012
Deck Chair Do Up
Picked up this beaut at the dump for five quid...Needed a clean up, some Briwax and some funky Ikea fabric to replace the original, saggy, dirty fabric.

Not too shabby, if I say so myself! Although, perhaps I could have spent a little longer at the ironing board (bored!). Nothing that won't stretch out with a little wear!


Not too shabby, if I say so myself! Although, perhaps I could have spent a little longer at the ironing board (bored!). Nothing that won't stretch out with a little wear!

Sunday 15 July 2012
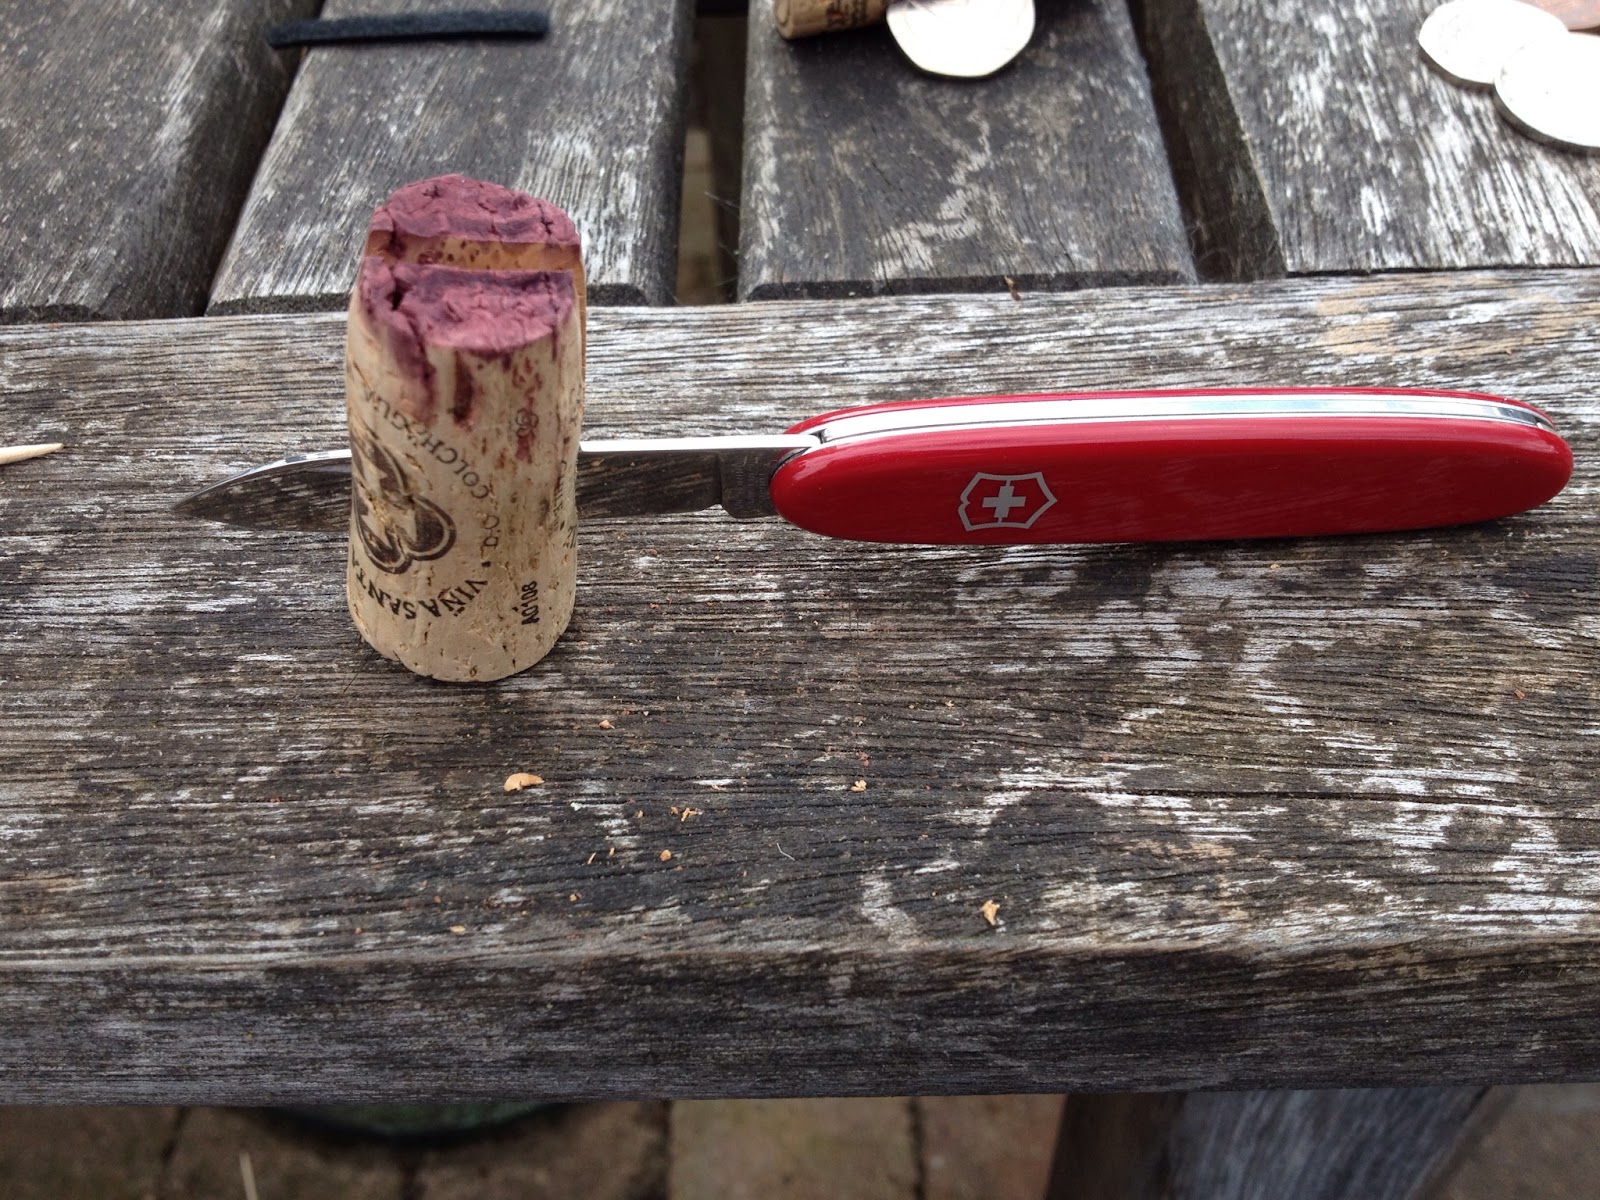
Boys & Boats


Just cut the cork in half.


Tuesday 3 July 2012
Dolly Quilt Tutorial
I made a New Year's resolution to myself to try and
make more birthday presents this year. I am not doing too badly, which is
partly why I haven't managed to blog very much...
For Margot and Kate - both recently 3 years old, I
made dolly blankets.

For Margot I crocheted a granny square blanket and
made a small patchwork quilt and pillow.

The crochet blanket was a single granny square made
really big (12 rounds) and then finished off with a row of double crochet all
the way around. I alternated the colours every two rounds.
See Pip's blog for how
to make a Granny Square.
Then I made this mini patchwork quilt...
To make quilt measuring 13" by 17" you'll
need:
20 mixed 3.5" squares
1 piece backing fabric 14" x 18"
1 piece wadding/batting 14" x 18"
Thread, scissors etc
First cut out your squares. It's easier to cut with
a roller if you layer the squares rather than cut single layers of fabric. The
blade works better and it's also quicker. I used a bought plastic square (er...not sure what the official name for that is) but a piece of stiff
cardboard works just as well.

Lay out the pattern however you like it - I find it
quite useful to take a picture here so that you can refer back to it as once
you start picking up squares to sew together it can get a bit confusing.

A very useful tip from my sewing teacher is to use
masking tape or something similar on your machine to keep you
straight. She was showing it to someone making curtains but I have used
it permanently since and it has really helped keep me on the straight and
narrow.

Take the first and second squares and lay them
front side to front side facing and sew with a 1cm seam along one side (so your
tape should be 1cm out). Now open it out and lay the third square on the second
square and repeat - you are making a column. Refer to your photo if you are
getting muddled.

Do this for all columns and press seams flat. Usually with quilting seams are pressed to one side but I want this to sit
completely flat. Plus it's doesn't need the extra strength that pressing to one
side gives.

Lay two columns together RSF (right sides facing)
and making sure all the square joins are as close to matching as possible, sew
with a 1cm seam all the way down to the bottom. Then join the rest of the columns in
the same way.

Press all your seams flat and iron the front side too. Now trim your backing fabric and your batting to match this size.
The next thing I did for ease (and because it is
just a dolls blanket!) is quilt the batting to the patchwork. Lay the
batting on the back of the patchwork and slowly follow the squares either across
or down (or both).

Now lay this patchwork with it's attached batting
face down on top of the backing fabric facing up (so RSF).

Tidy up the edges.

Then sew around all edges with 1cm seam leaving a 10cm gap in one
edge. In this picture I have rolled the quilt to make it easier for me to
keep straight (I have a tendency for slightly wonky sewing).

Trim the corners.

Turn out through the hole.

Press the seams on the opening so that you can
stitch up that hole as you top stitch all the way around.

Et voila, one satisfied customer!
Thursday 28 June 2012
Two dresses

I made these two dresses this summer and I'm really pleased with them, although not that happy with the summer itself but let's not go there! They are lined at the top with hidden zips. The top has darts and the skirt is gathered. The pictures are a bit rubbish and slightly embarrassing but my friends in NZ and Aus will want to see them so it had to be done.

Bobbin and the artists who have space in the Brassey Road studios are having two open days this weekend if you fancy popping in and having a chat about the courses. There is something for everyone. Guaranteed!

Subscribe to:
Posts (Atom)