Thursday 23 June 2011

Craft book reviews

I have lots of lovely sewing, crochet and crafty books on my shelves. I was about to list my favourites when I realised that before you can review a craft book, you really should have made something from it. So the first two books I am going to review are by Pip Lincolne because I have made things from those and they also happen to be two of my favourites.

Meet me at Mike’s – by Pip Lincolne
This first book ‘Meet me at Mike’s’ was given to me by my husband for Christmas 2009. I am not kidding you, this book caused an epiphany! I read it from front to back to start with (I do that with craft books) and it completely re-ignited my long since missing crafty self. I don’t know where crafty self went for a while. I think I was pre-occupied with partying, socialising, husband hunting, moving, marrying and making a couple of babies. Anyway, once crafty self was released, I was eating, sleeping, dreaming crafts projects. So obviously this book is special for me. Some people go to India to find themselves. I opened this book.
So, information you might actually find useful about this book.  I love the style of writing. It’s like you are having a nice chat with an encouraging friend over a cuppa. It makes you feel like you really could make anything in the book.
As it happens, I chose to make two very simple things from this book as I needed some baby presents at the time.

Cutest ever baby knickers
I made the knickers quite a while ago and I don’t remember having any issues at all with the instructions. They were very cute indeed. I was slightly disappointed that the fabric I had chosen looked girlier than I had originally thought once they were made up. It meant I couldn’t keep them for youngest son. I did try but my husband vetoed it. They really did look super sweet though. Although, slightly distracting. Very hard to do anything other than squeeze chubby thighs.
I sent them to a friend for her baby along with a baby-grow which I had appliquéd with the same fabric. I would only change one thing if I made them again. I used a quilting cotton last time and next time I would use pre-used fabric such as an old pillowcase (as per book suggestion) or a dress making fabric that is slightly thinner than quilting cotton. I think they would be softer and more comfy straight away.

Teeny tiny goody two shoes
Gosh, I started these when I first got the book but I didn’t have any elastic so had to put them to one side (that is such an annoying thing to have to do!) I also didn’t really have a crafting space at that time so they got bumped down the list of more urgent and exciting things even when I did eventually have the elastic. I eventually finished them the other day and they are very sweet. I encountered a few frustrations in the final stages of putting them together but nothing to do with the instructions...I was just rushing instead of easing things along!  They are cute and pretty easy and would make a sweet newborn pressie.
 
Crocheted granny square
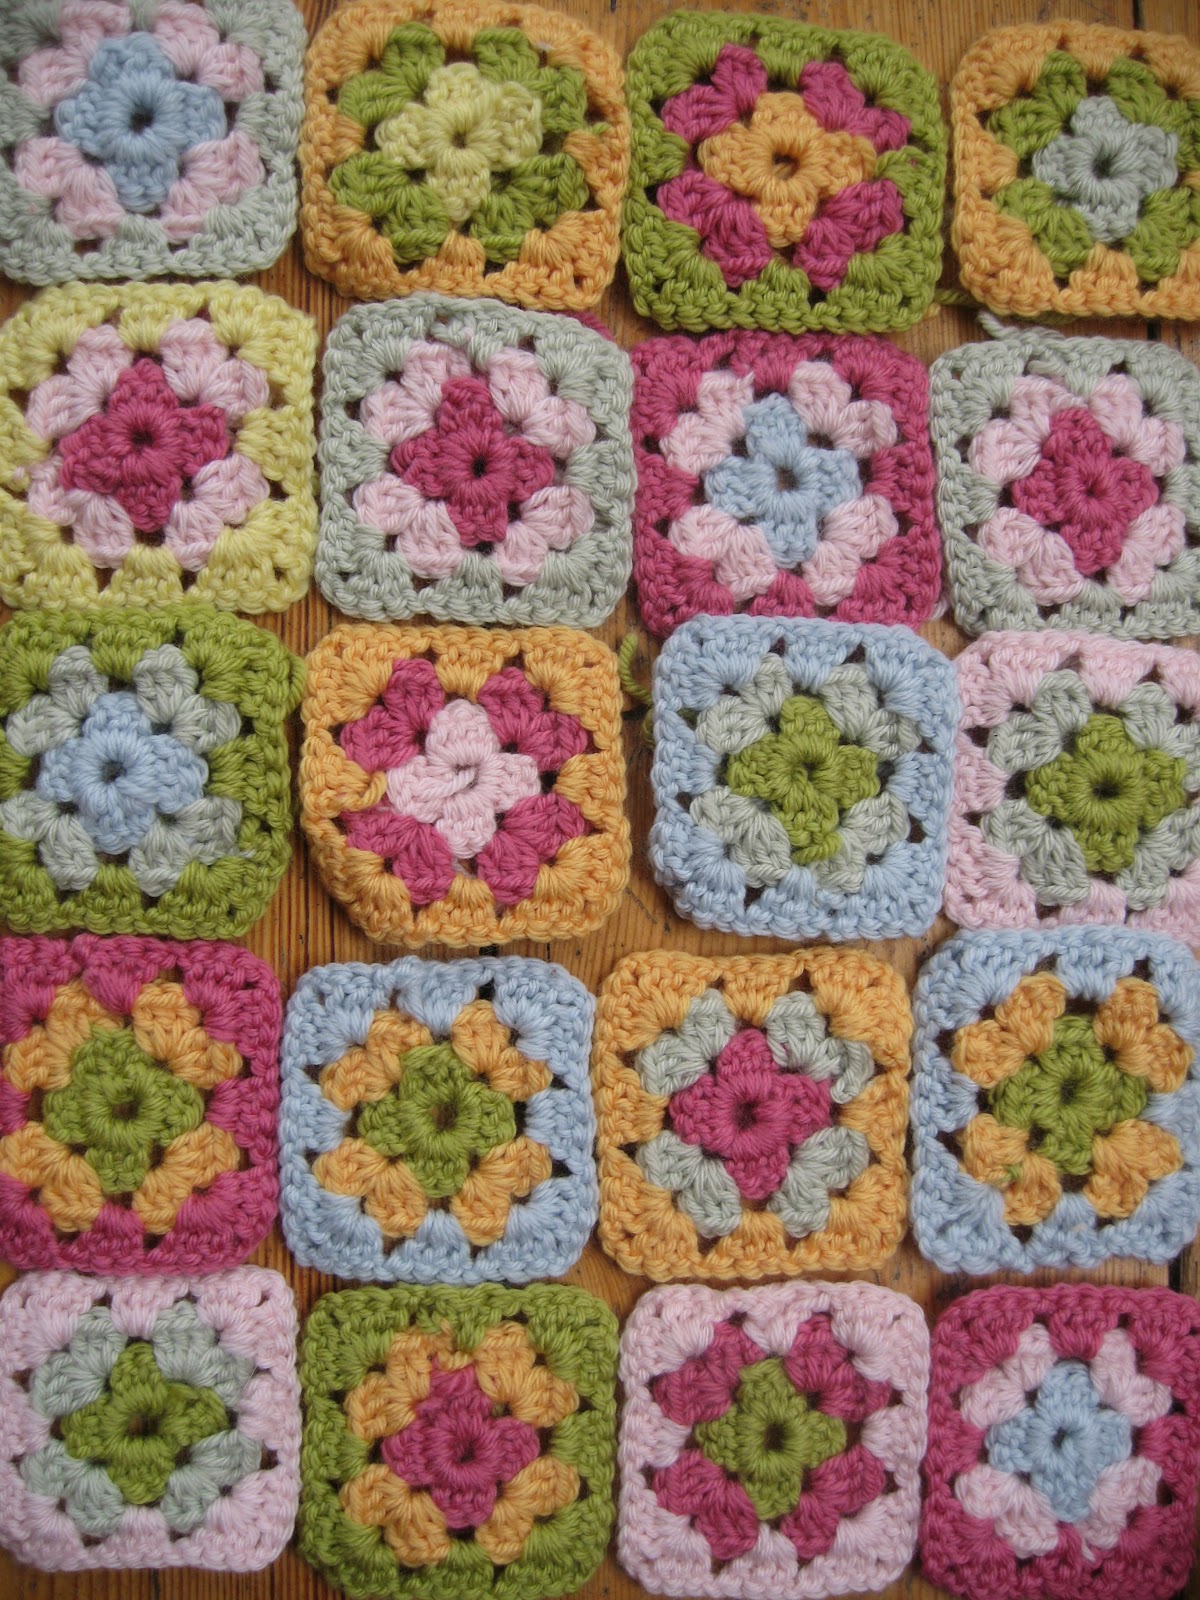
Well, this set me off on some whole new world of yarn and hooks and blankets and hats and books...even my previously crafty self had not knitted or crocheted. Anyway, once you get it, crochet is a piece of cake...It really is very simple and personally I think easier and quicker (I’m a bit of a results driven person!) than knitting. So I tried to follow Pip’s instructions and I nearly got there, but not quite. Having said that, I also couldn’t quite get it by following anyone else’s written instructions in books or online. No, it’s just a bit hard to learn to crochet by word alone. It all fell into place for me when I watched a few videos on youtube. Suddenly it all makes sense. Pip actually recommends this too. Better still, find someone to show you. I couldn’t find anyone to show me...I really tried too! I called several nursing homes looking for a granny who might like a slice of cake in exchange for a few hints and tips...no joy. I even called Age Concern who asked all the ladies on the Monday to Friday lunch clubs. Still No. Then I called craft and wool shops and asked about courses...Nothing! So in the end I figured it all out by looking at this book and watching clips on youtube ...just make sure you are watching someone who is teaching it in the right language – American terms for crochet are different from the UK and the rest of the world.
Anyway, after making many squares in beautiful colours I realised how long it was going to take to make the hugeous blankie that I desired...all those colour changes and all those endy bits plus lots of sewing together...so I decided to make one humongous square. 
No sewing together and a lot less endy bits. It is so easy to make this blanket...if you like it you can literally do a few rows every night and in no time you have a lovely snuggly blanket.  I will blog more about crochet and yarn soon, in the meantime, you should really see Pip’s amazing blog if you are interested in knowing more about crochet.

Sew, la, tea, do by Pip Lincolne
When this book came out, I had to have it, but sadly I also had to wait as it takes ages to get over here from Australia. I got it about two months ago. First off, it’s another great read. The patterns are cute and slightly more advanced than the last book...just the right amount. So yesterday I made a pair of these trousers for my children (yes one pair, both children - my youngest son is a giant two year old so he kind of shares some of his four year old brother’s clothes).
So the trousers took me 2 hours and 8 minutes including 1 x cup of tea (make and drink) and 1 x packet crisps (raid and eat).
I knew I would like these and probably want to make them again so I traced the pattern onto thicker paper to keep safe and use again. I then held the paper pattern pieces onto the fabric and cut out, partly with my rotary cutter (long straight bits) and fiddly bits with scissors. 
I should have pinned the pattern on to the fabric but I just wanted to get on so I didn’t. It came out fine anyway. Now, it said cut out each part twice but it didn’t say make sure you turn the pattern over before you cut out second one! Fortunately my fabric was identical back and front so when I forgot to do this it didn’t matter. Phew! Also my fabric was stripy and I forgot to make sure the stripes were straight on the leg bits, luckily they were.
From there I followed the pattern to the letter...I pin like this... I was shown how to do this and it’s a good tip as you can sew over the needles and they are also easy to remove if you don’t want to do that.
Also, I forgot that you only need to pin the part you are sewing. I got a bit carried away, pinned the backs together and then realised I only need to pin one section, sew, then open out. Durr!
After that, my only other tip is to always read one step ahead. Then you kind get the aim of the part you are focussing on at the time.
I added small sewn up ‘turn ups’ as they were too long for my two year old and I like turn ups. Stitched ones are good as they don’t get t full of sandpit. I folded them up three times as I wanted to be able to let them down later.
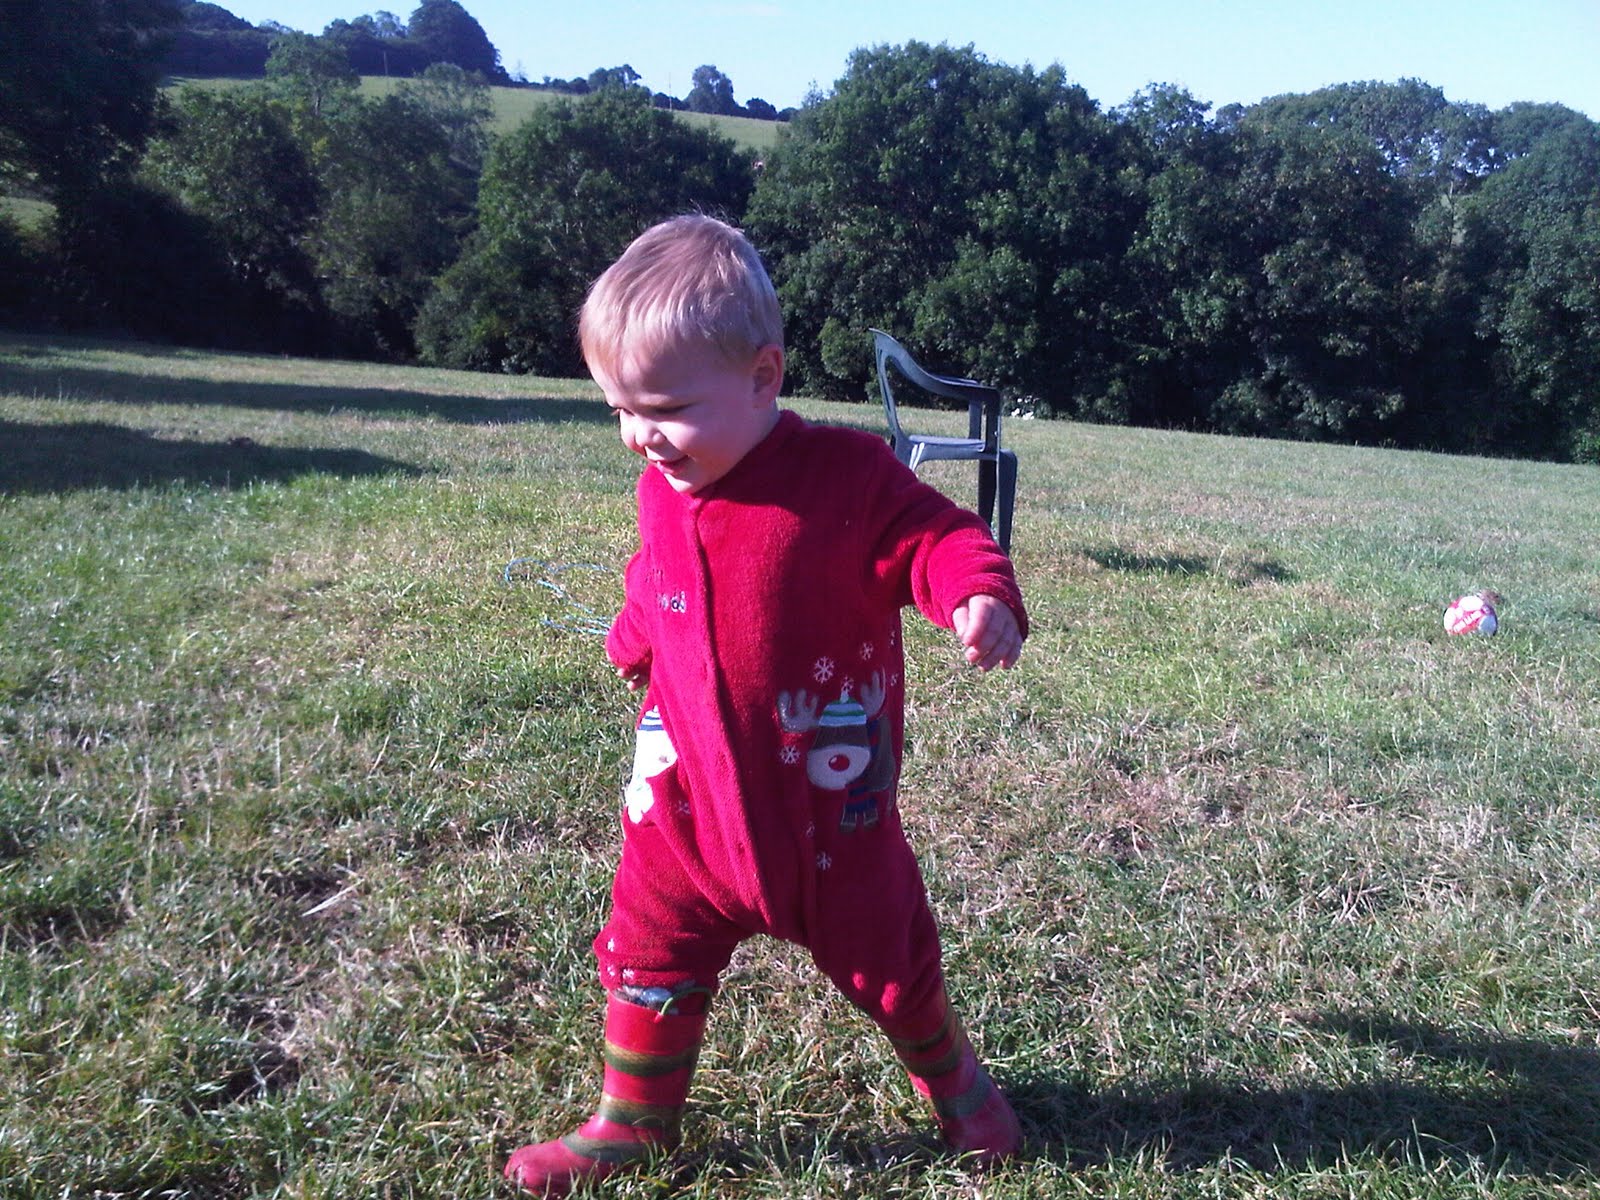
I am really pleased with them. I think they are really sweet. Unfortunately as they don’t have Lightning McQueen on them they were received very cooly by my four year old. My two year old has yet to be corrupted by the world so he quite likes them although I had to promise him that he could have a go with my camera in order to get this picture.
So the next thing I am going to make (in a minute! Hurrah!) from this book is actually not a pattern but the cute bunting from the front cover. It’s so colourful and mini. I think it would look so nice adorning a child’s headboard (yes, one past the age of putting things around necks) or the doorway to your tent or even your bathroom...I have to make it as I have not been sleeping well thinking about making it. That is nuts isn’t it! I know it is.
So, just to summarise, and in case you hadn't already gathered, I love these two books, the pictures, the patterns, the illutrations, the words, the fonts, the lot...and I also love the blog!

Turrah for now, Nix!

Sunday 19 June 2011

Two more cakes...and Happy Father's Day!

I baked and iced these two cakes last night for a party we are off to today. They are for my friend Jacqueline's twins, Siena and Oliver. It is a joint first birthday and naming day celebration. It's a ceremony, then a picnic, then rounders so fingers crossed for weather.
The recipe is the same one I always use. Oliver's cake is chocolate sponge with white chocolate icing and Siena's is plain sponge with jam and buttercream. I am pleased with the chocolate one and have Thea to thank for the design idea. Very classy don't you think? Thanks me dear. All the toppings were from Sainsbury as I left it a bit late. I was going to try and find a cake decorating shop but ran out of time. Sainsbury did have a much better selection than Tesco though.

Father's Day
 
Hopefully all the Daddies are enjoying Father's Day. Ed got this card and some wine from the boys but his real treat is next weekend. I am taking the boys away for a week in Cornwall with my Mum and for the first time since the children have been born he will get a whole weekend in the house all by himself. He has a tight schedule planned...It  goes something like this:
Friday: Play football, go to pub, watch Glastonbury hightlights.
Saturday: Lie in, play golf all day, order in pizza, watch Coldplay and U2 ont' telly.
Sunday: Lie in, play computer games all day, cook a roast for one.
He is a lucky boy isn't he...he will miss us in the week though.

Saturday 18 June 2011

Camping - The essentials...well, sort of!

A friend who is braving a camping trip with me and my boys in mid July has asked what she might need so here is the list I came up with...feel free to comment if you think I've missed anything!
I LOVE camping but I do like to have a few home comforts around to make it feel cosy. So my list is roughly in order of importance...i.e. it starts with a tent and ends with solar powered fairy lights!


A tent – we just got a new one as I have been borrowing or making do with a tiny one and I have finally convinced Ed that I really do love camping and it really will be a worthwhile investment.
A mallet – and a few spare tent pegs.
Camp beds or mattresses – We have always used the self inflating mattresses before now, however, I don’t think they are that great for kids as sleeping bags are slippery and the mattresses are slippery and the children end up in a corner of the tent. So this year we have all got beds so we’ll see how it goes.
Sleeping bags & plenty of blankets – Even in midsummer it can get freezing cold at night (or in the middle of the day!) so a sleeping bag is essential especially for children who might kick off covers. You will also need extra blankets plus thick socks and dressing gowns. If you have been camping in England before you will know I am not exaggerating. Maybe you won’t need this much stuff but then again you just might!
Pillows from home – a comfort essential.
Lantern & torch – The camping lanterns you can get are really good particularly the LED ones which last forever and some come with a little remote. I just got this one from eBay ‘Adventuridge LED Camping Lantern with Remote Control’ for £12.50 incl postage. A torch is also useful for late night trips to the loo.
Potty, loo roll and wet wipes – if you have children!
Camping chairs and picnic rug
Camping stove – got to be able to make a cuppa.
BBQ & charcoal – disposable ones are fine but you may need to find bricks or stones to put them on. For a few years we have had a notebook BBQ. They are really good as you can also make a fire in them in the evenings. These are widely available on web.
Logs, kindling, firelighters – Call me a cheat but I like to KNOW I have everything I need for a fire. I’m not a pyro but I really do love a fire. So cosy, warming and hypnotic mmmm...where was I?
Cooking items – Kettle, pans, mugs, glasses, tin opener, bottle opener, tongs, wooden spoon, cutlery, plates and bowls, matches.
Washing up items – Washing up bowl (in the camping shops they are diddy but actually there is usually quite a bit of washing up so a full size one is better, washing up liquid, scourer, dishcloth.
Coolbox with ice packs or car fridge – if you like your beer or milk very cold the coolbox fridge that you can plug into the car occasionally is a good idea but not essential for a short trip.
Table – for your cups of tea or glasses of wine.
Children’s table – We got this one the other day. It has the seats attached and folds up. My children are messy eaters at the best of times but eating beans on a picnic rug, well it would be ineffective and also disgusting. It can be used by adults too but the cheaper ones like mine are not really suitable. There are loads available on the web.
Towels
Wellies & Woolies – socks and jumpers that is. Get’s cold at night and you wouldn’t want to miss out on those late night campfire sing songs now would you!
Car phone charger & fully charged camera battery
Tablecloth – it’s homely and cosy and draws admiring people in for a nice cuppa and a chat. Honest.
Doormat & dustpan & brush– if you take pride in your tent!!
Flagpole & flag – if you like to mark your territory or celebrate your holiday!
Bunting – It’s cheery.
Solar Fairylights – Ditto.
Food and drink – The last thing you want to do when you have just got set up, particularly if you’re only going for a few days,  is to have to go food shopping. No, I like to take a few foody bits and at least one slap up meal and then pick up the rest from the local farm shops etc. So my food list looks like this in no particular order:

  • Cheeseballs (the only item on the entire camping list suggested by Ed! He loves a cheap cheesy snack)
  • Tea & coffee
  • Beer & wine
  • Breakfast cereal
  • Chipolata sausages
  • Bacon
  • Eggs
  • Beans
  • Bread & rolls
  • Milk
  • Ketchup
  • Tomatoes
  • Cheese
  • Apples
  • Bananas
  • Snacks a plenty
Okay, so I think that's it but please do comment if you can think of anything else! Nothing big though, Ed is already ranting about how we will fit it all in. I shouldn't have shown him the list!
Happy Camping! Nix

Last year's camping trip
A very happy camper
Gabe getting some country air

Freedom
Nice view, no tablecloth though!

Fires and fairylights


Thursday 16 June 2011

My first attempt at dressmaking - Schoolhouse Tunic by Sew Liberated

At last, I have braved and successfully made an item of clothing! It is my very first time and I am very pleased with the results!

I started it last week and I did get some help at the beginning from my sewing teacher, May. I go to a sewing class once a month, you can take whatever you are working on – anything from quilts, dress-making, bunting, soft furnishings – and May helps you along the way with advice, tips, sewing machine know-how, understanding your pattern or project. Basically what May doesn’t know about sewing isn’t worth knowing!

So I finished the tunic today just by following the instructions and working it out for myself. It was very clear and easy to understand. I think in total it took me about 6 hours from start to finish including cutting the pattern out, then the fabric, sewing it all together and finishing it all nicely. I think it must be a pretty straight forward kind of pattern or perhaps just well written as it all went smoothly. Hardly any swearing at all!

I cut out and made the 10/12. I think it’s quite accurate size-wise...On me I would say it’s slightly too big around my waist but the smaller size would have been too small on the sleeves and top. Anyway, I love the style so I am going to leave this one as it is, comfy and airy for summer and make another one, probably in a dark colour for winter in heavier fabric...maybe needlecord...I am thinking a dark green or French navy. Anyway, next time I am going to adjust the pattern slightly to taper in more at the waist and be slightly narrower in the skirt. Also, I made the dress slightly shorter than on the instructions and I would like to thank Jenny and May for telling me it was short enough! There was no mirror and it really is short enough!


The pattern is called Schoolhouse Tunic No. 106 by Sew Liberated

I am still new to this whole blogging thing and have yet to work out things like tagging my words and including links...all in good time!

A cake baking day tomorrow! Bye for now, Nix X

A Cooking Day

When I have done a big food shop and there is a lot of fresh veg and meat I like to cook up a few different things right away so that it is as fresh as possible. It also means that one day spent in the kitchen results in three or four days heating something up and adding some fresh veg rather than cooking from scratch every night of the week. Also means if the kids and I spend the day doing something really nice and stay out later than expected there is always a hot healthy dinner when we get home. So yesterday was a cooking day. I made Nigella's Veggie Chilli, this is mainly for me as v healthy, filling and spicy. I also made a corned beef hotpot for Ed and the children as they are all meat and potatoes people! I also had my lovely 'In Laws' coming for supper so I made a chicken and ham pie with new potatoes and fresh vegetables. We started with some yummy king prawns and finished with fresh summer fruit and cream. All very easy (until I dropped Ed's plate while dishing up!). I took some pics but food pics tend to be a bit yuk don't you think?...plus I am not really a food presentation person.

RECIPES
 
 Nigella's Vegetarian Chilli


2 tblsp olive oil
2 medium onions, finely chopped
2 cloves garlic, minced
3 cups red bell peppers (about 2 large peppers), finely diced
1 heaped tsp hot red pepper flakes
1 tsp ground coriander
1 tsp ground cumin
3 cardamom pods, lightly crushed
1.5 cups red lentils
3 cups (1 can) canned chopped tomatoes
3.5 cups drained canned kidney beans (I just use 2 cans as it’s a waste to throw half a can away and am unlikely to use for something else)
1/4 cup ketchup
1/4 cup tomato paste
1 TB unsweetened cocoa powder

  1. To prepare chilli, heat olive oil over medium-low heat in a deep,
wide pan with a lid. Add onions, garlic and bell peppers, and sauté
until softened, about 5 minutes. Stir in red pepper flakes, coriander,
cumin and cardamom pods. Stir in lentils.
              
2. Add chopped tomatoes, kidney beans, ketchup, tomato paste, cocoa
and 3 cups water. Stir well. Cover, and simmer, stirring frequently,
until mixture is thickened and beans are tender, about 45 minutes.

Chicken and Ham Pie

Forgot to take a picture while it was still whole!

The ham: OK, so I got a nice piece of applewood smoked pork loin, boiled that in water (for the suggested baking time on wrapper) with some carrots and onions to create a nice hammy stock, removed the meat saving/reducing the stock, ditching the veg.

The chicken: I baked four chicken breasts which I had rubbed in a bit of chicken stock cube and some olive oil. Better if you can use left over roast chicken meat which is more flavoursome.

The white sauce: I made a kind of creamy sauce. I used the stock from the ham, some of the the chicken juices and the rest of the stock cube, butter, flour, milk and a little cream...I kind of made this up as I went along but started with 40g of flour and about the same of butter. I mixed those together in a pan and then slowly added the liquids which I had mixed together in a jug. Normally when I make a white sauce there is more butter however, the stock, milk and cream had a fair bit of fat in them so I cut it down. The result was a creamy rich sauce with a lovely flavour. I mixed in all the cubed chicken and ham and left it to cool.

Later I rolled out some shop bought shortcrust pastry, buttered my pie dish and lined it with pastry added lots of my pie mix, topped it, brushed it with egg and put it in the oven for about 40mins. It was homely and delicious.

There was pie mix left which I will give the children today with pasta or rice and vegetables.

 Hotpot/Monday Pie/Cook Together


This is a very very simple meat hotpot - It can be made with any leftover meat. I hate throwing out food so I like recipes like this that make a meal out of a few good quality leftovers, a few potatoes and an onion. My Dad used to call it ‘Monday Pie as my Mum used to make it with the roast meat leftovers on a Monday. Ed’s family call it ‘Cook Together’.


Corned Beef Hotpot for four people


2 small packs of corned beef

4  Large potatoes, sliced up about 1cm thick

2 Med onions, very thinly sliced

3/4 pint of beef stock

Butter for the top


Layer up meat, thinly sliced onions and potato. Build the layers up and then pour over the stock. It doesn't need to come up to the top. Put it in the oven on high with a lid or tin foil to get it bubbling then after about half an hour remove lid put some butter on the top, turn it down low and leave it as long as you like. I made it at lunchtime yesterday and got it out at tea time for the children. If you want to eat this quite quickly then just leave on high for an hour. Test the potatoes with a knife before serving.

You can add carrots if you make it with roast lamb or add leeks if you make it with chicken. Ed likes corned beef, the deli packets are better than the tinned stuff and it keeps in the fridge for a while so it's quite handy for a last minute meal when there is not much in. It actually tastes better re-heated the next day so Monday pie is usually eaten on Tuesday in our house.

Sunday 12 June 2011

Festival flag for Jimma...Another job done!

I also drew on this flag for my brother in law today. It's a huge thing. Took up my whole dining room table. He goes to Glasto every year and in 2008 I made a flag for him 'proper clownshoe' see below...it was too heavy to fly though so now each year I get a purchased flag and some fabric pens...I can't find any pictures of the flags I did from 2009 or 2010 but they were on white and then pens came out really well. This is the first time we have used a yellow flag and it hasn't come out quite so well (although it does look better than in the picture). Next year, white flag and fabric paints instead of pens...
 

Rainy Day in Winchester

So today was very wet and a bit cold...I was going to go to the carboot sale but when it started tipping down at 8.00 I was glad I was sat with a nice cup of tea, bacon sandwich and the Sunday papers...So in the end we haven't really left the house today. It's been a day for resting and nourishing or in other words, slobbing about in comfy clothes and eating lots.

CAKE
This morning I made lots of lemon and raisin fairy cakes and a couple of loaf shaped cakes. I freeze the fairy cakes (not iced) and then take them out each day for lunchboxes. They defrost perfectly by lunchtime and taste fresh and moist. I let the boys decorate some to keep them busy for a while. I  started off watching them and helping/interfering but in the end I just had to walk away. The mess, the lack of style, the icing everywhere...better just to let them go for it and clear up afterwards. Zac had icing in his ears! So my cakes today didn't look all that, but they smelt good and my boys said they tasted good, especially the ones they had decorated.


Here is the recipe I use for all my sponge cakes, it is adapted from Delia's 'All in One Sponge' from her book 'Complete Cookery Course'.

All in One Sponge Cake Recipe

The Sponge Ingredients

175g / 6oz Self-raising flour, sifted
1 Teaspoon baking powder
175g / 6oz Soft 'spreadable' butter, at room temperature - I use full fat 'Lurpack Spreadable'
175g / 6oz Caster sugar - if you can get 'golden caster sugar' which is unrefined, that has a nicer taste but don't worry if not
3 large eggs
2-3 drops of vanilla essence - if making a plain sponge or 1 tablespoon sieved cocoa if making a chocolate sponge

The Icing Ingredients

115g / 4oz soft butter
230g / 8oz icing sugar
1-2 tablespoons milk
For white - A few drops vanilla essence
For choc – 30-50g / 1-1.5oz melted dark chocolate - highest amount of cocoa solids you can get.

How to bake it...

Pre-heat the oven to gas-mark 3 (170 C). You will need 2 x 7-8 inch sponge tins.  Each should be no less than 1 inch deep. You can get ones where the bottom comes out - these are quite good. Butter them well and then flour them.

Take a large, very roomy mixing bowl and sift the flour, baking powder and cocoa powder into it holding the sieve high to get lots of air into the flour (quite important). Then gently beat together the eggs in a separate bowl and then add these, with all the other ingredients into the big mixing bowl and whisk everything with an electric hand whisk until thoroughly combined.

If the mixture doesn't drop of the wooden spoon easily when tapped on the side of the bowl then add 1-2 teaspoons of tap-warm water and whisk again.

Now divide the mixture between the two prepared tins, level off and bake on the centre shelf of the oven for about 30 minutes. You should be able to see the edge of the cake coming away from the sides of the tin - this is a sign the cake is ready. When cooked and out of oven, leave them in the tins for only about a minute, then loosen the edges by shaking the tin from side to side and then rotating and repeating. It should come loose but if it doesn't take a palette knife and slide it around the edge. Turn them on to a wire cooling rack. Mary always places the tin, once it has cooled off a bit, back over the top of the cakes, apparently it stops them from drying out.

1 heaped teaspoon per normal cupcake for 24 cupcakes.

Icing - put all the ingredients in a bowl and mix together - use half the icing for the middle of the cake and half for the top. Make sure the cake is properly cooled before icing or it will slide off.

Here are some of my other cakes...all the same recipe...thanks Delia or 'Darling Delia' as my Mum in Law would say!


First Post...Done!

Welcome to my blog...so...this is my first ever post. It should be memorable but I have been over-thinking it so I am just going to get it out, and get on...while I have be dawdling along preparing this blog and faffing about with the editor I have done lots of cool stuff and all the time I was thinking...I could have blogged that if I’d pulled my finger out...so here I am pulling my finger out. 
Thanks for looking, Nix